

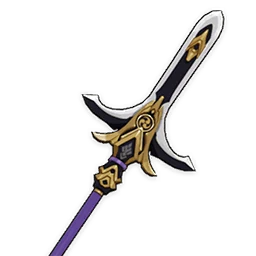

4PyroPolearmInazuma
Profile affiliationYashiro Commission
Ascension statATK
Recent Endgame Usage
Overview
Thoma refreshes shielding and Pyro hits through a Normal-Attack driver. Protection-focused HP and Burgeon-focused EM serve different jobs, but both builds need reliable Burst access.
Role
Stacking HP shield / conditional Burgeon trigger
Playstyle
Activate Skill and Burst, then use a Normal-action driver to refresh protection or trigger a planned core reaction.
Why It Works
Blazing Barrier absorption uses HP and stacks only up to its native cap.
Watch For
Shield-focused HP stats and reaction-focused EM stats are different priorities; do not promise both at full strength.
Playstyle
Combat Flow
Hydro/Dendro setup → Burst then Skill with Kitain → Normal-attack driver → maintain core production and shields.
Key Notes
Normal actions trigger Fiery Collapse.
Repeated barriers stack absorption up to its cap.
Burgeon damage needs level and EM, not Pyro DMG Bonus.
With Kitain, cast Burst before Skill.
Build & Investment
Best Weapons
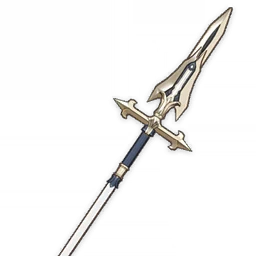
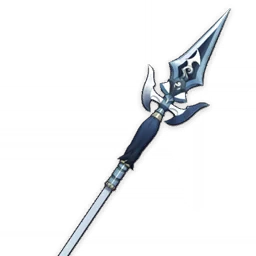
Accessible shield HP · 3★
Black Tassel
Use only after Burst Energy needs are covered.
Best Artifact Sets




Burning-team support
Deepwood Memories
Use for a Dendro damage dealer when no better holder supplies resistance reduction.
Main Stats
Sands
- Energy Recharge
- Elemental Mastery for BurgeonAlternative
- HP% for shieldsAlternative
Goblet
- Elemental Mastery for Burgeon
- HP% for shieldsAlternative
Circlet
- Elemental Mastery for Burgeon
- HP% for shieldsAlternative
- CRIT Rate with FavoniusAlternative
Recommended Substats
- ER for Burst uptime
- EM in Burgeon / HP% for shielding
- CRIT Rate with Favonius
ER Requirements & Stat Targets
- Burgeon ER · R3 Kitain + two Favonius teammates
- ~240%; C4 ~190%
Constellation Investment
C2
Extends the Burst duration by three seconds.
C4
Returns 15 Energy after Burst.
C6
Refreshing a barrier grants Normal, Charged and Plunging damage bonuses.
Teams
Recommended Teammates



Most-played compositions in our calculations. These reflect popularity and what players actually use, not a power ranking.
150 team observations10 recent contexts
Most Played With











Talents

Normal Attack
Swiftshatter Spear
Normal Attack
Performs up to 4 consecutive spear strikes.
- 1-Hit DMG
- 87.8%
- 2-Hit DMG
- 86.2%
- 3-Hit DMG
- 53%×2
- 4-Hit DMG
- 133.1%
Charged Attack
Consumes a certain amount of Stamina to lunge forward, dealing damage to opponents along the way.
- Charged Attack DMG
- 223%
- Charged Attack Stamina Cost
- 25
Plunging Attack
Plunges from mid-air to strike the ground below, damaging opponents along the path and dealing AoE DMG upon impact.
- Plunge DMG
- 126.4%
- Low/High Plunge DMG
- 253%/316%

Elemental Skill
Blazing Blessing
Thoma vaults forward with his polearm and delivers a flame-filled flying kick that deals AoE Pyro DMG, while also summoning a defensive Blazing Barrier. At the moment of casting, Thoma's Elemental Skill applies Pyro to himself.
The DMG Absorption of the Blazing Barrier scales off Thoma's Max HP.
The Blazing Barrier has the following traits:
·Absorbs Pyro DMG 250% more effectively.
·When a new Blazing Barrier is obtained, the remaining DMG Absorption of an existing Blazing Barrier will stack and its duration will be refreshed.
The maximum DMG Absorption of the Blazing Barrier will not exceed a certain percentage of Thoma's Max HP.
- Skill DMG
- 264%
- Shield DMG Absorption
- 13% Max HP+1525
- Shield Duration
- 8s
- Max Shield DMG Absorption
- 35.3% Max HP+4153
- CD
- 15s

Elemental Burst
Crimson Ooyoroi
Thoma spins his polearm, slicing at his foes with roaring flames that deal AoE Pyro DMG and weave themselves into a Scorching Ooyoroi.
Scorching Ooyoroi
While Scorching Ooyoroi is in effect, the active character's Normal Attacks will trigger Fiery Collapse, dealing AoE Pyro DMG and summoning a Blazing Barrier.
Fiery Collapse can be triggered once every 1s.
- Scorching Ooyoroi Duration
- 15s
Except for the amount of DMG they can absorb, the Blazing Barriers created in this way are identical to those created by Thoma's Elemental Skill, Blazing Blessing:
·Absorbs Pyro DMG 250% more effectively.
·When a new Blazing Barrier is obtained, the remaining DMG Absorption of an existing Blazing Barrier will stack and its duration will be refreshed.
The maximum DMG Absorption of the Blazing Barrier will not exceed a certain percentage of Thoma's Max HP.
If Thoma falls, the effects of Scorching Ooyoroi will be cleared.
- Skill DMG
- 158%
- Fiery Collapse DMG
- 104%
- Shield DMG Absorption
- 2.1% Max HP+242
- Shield Duration
- 8s
- CD
- 20s
- Energy Cost
- 80
Passive talents

Passive talent
Imbricated Armor
When your current active character obtains or refreshes a Blazing Barrier, this character's Shield Strength will increase by 5% for 6s.
This effect can be triggered once every 0.3s seconds. Max 5 stacks.

Passive talent
Flaming Assault
DMG dealt by Crimson Ooyoroi's Fiery Collapse is increased by 2.2% of Thoma's Max HP.

Passive talent
Snap and Swing
When you fish successfully in Inazuma, Thoma's help grants a 20% chance of scoring a double catch.
Constellations
 C1
C1A Comrade's Duty
When a character protected by Thoma's own Blazing Barrier (Thoma excluded) is attacked, Thoma's own Blazing Blessing CD is decreased by 3s, while his own Crimson Ooyoroi's CD is decreased by 3s.
This effect can be triggered once every 20s.
 C2
C2A Subordinate's Skills
Crimson Ooyoroi's duration is increased by 3s.
 C3
C3Fortified Resolve
Increases the Level of Blazing Blessing by 3.
Maximum upgrade level is 15.
 C4
C4Long-Term Planning
After using Crimson Ooyoroi, 15 Energy will be restored to Thoma.
 C5
C5Raging Wildfire
Increases the Level of Crimson Ooyoroi by 3.
Maximum upgrade level is 15.
 C6
C6Burning Heart
When a Blazing Barrier is obtained or refreshed, the DMG dealt by all party members' Normal, Charged, and Plunging Attacks is increased by 15% for 6s.
Stats & progression
Level 100
Maximum ascensionHP11046
ATK253
DEF803
ATK%24%
Level 100 Maximum ascension | HP11046 | ATK253 | DEF803 | ATK%24% |
| Level | HP | ATK | DEF | Asc. stat |
|---|---|---|---|---|
| 1 | 866 | 17 | 63 | 0% |
| 20 | 2872 | 56 | 209 | 0% |
| 40 | 4762 | 93 | 346 | 6% |
| 50 | 6091 | 119 | 443 | 12% |
| 60 | 7266 | 142 | 528 | 12% |
| 70 | 8440 | 165 | 613 | 18% |
| 80 | 9616 | 188 | 699 | 24% |
| 90 | 10331 | 202 | 751 | 24% |
| 100 | 11046 | 253 | 803 | 24% |